v1.1

Minor Versionm

by Jason Fox

Introduction

Vehicle: SITRAK C7H 540 2025+

VIN/chassis: LZZ8CLXDXSC717267

Location: Australia

Harness: HRN-CW03K3-A

Additional hardware: IOX-CLAMP

Recommended tools: screwdrivers, sockets, cable ties, panel tools, and similar installation tools.

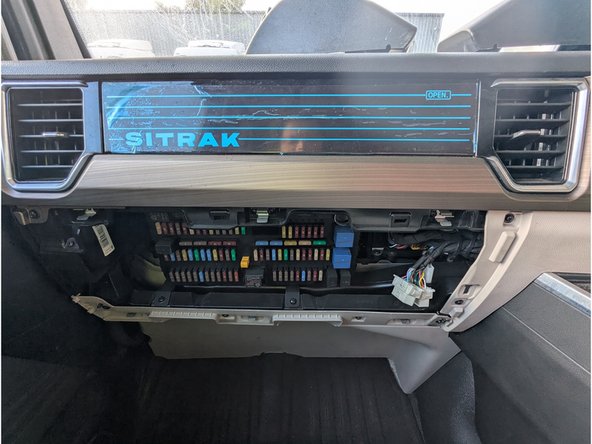
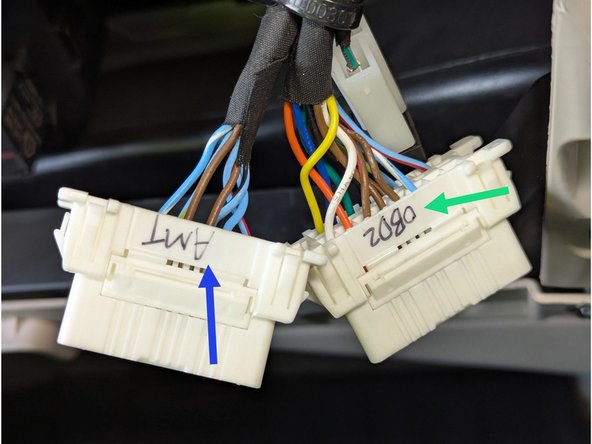
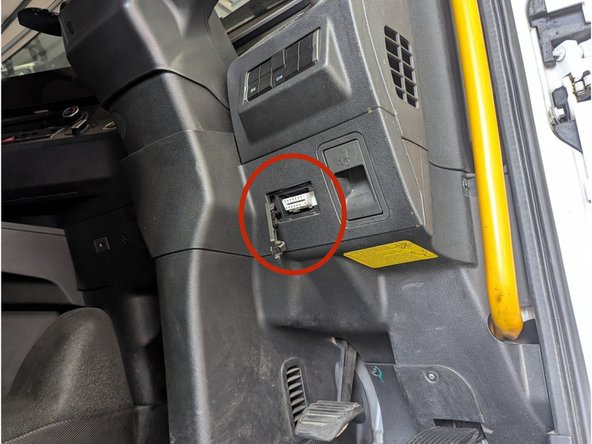
  1. This vehicle has 3 OBD2 ports: 1st OBD2 port is labeled OBD is on the driver side near the footwell. 2nd OBD2 port is labeled OBD2 on the passenger side behind the lower dashboard panel beside the fuse compartment.  This is the port we will be using to clip the IOX-CLAMP.
    • This vehicle has 3 OBD2 ports:

    • 1st OBD2 port is labeled OBD is on the driver side near the footwell.

    • 2nd OBD2 port is labeled OBD2 on the passenger side behind the lower dashboard panel beside the fuse compartment. This is the port we will be using to clip the IOX-CLAMP.

    • 3rd OBD2 port is labeled AMT is also on the passenger side tied together with the 2nd OBD2 port.

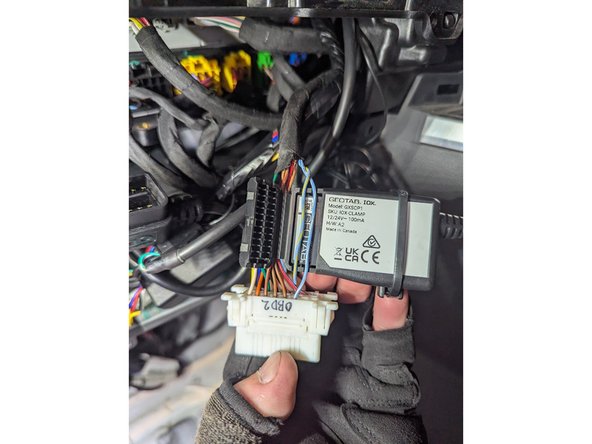
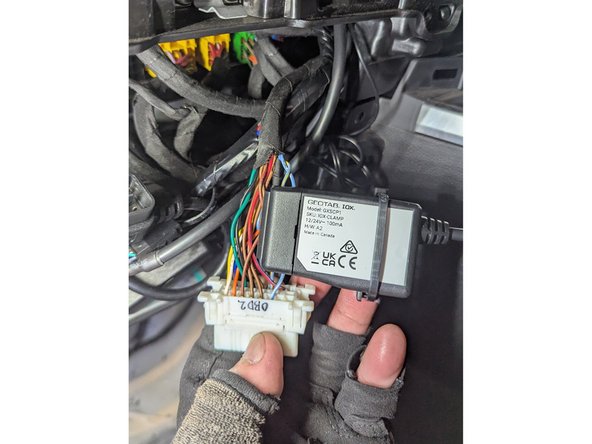
  2. Open the clamp and insert both wires (Pin 6 (CAN Hi) - Light/Blue-White and Pin 14 (CAN Lo) - Light/Blue-Yellow) of the OBD-II port labelled “OBD2” into either of the device cavities. Ensure the wires are seated in the grooves of the clamp as shown.
    • Open the clamp and insert both wires (Pin 6 (CAN Hi) - Light/Blue-White and Pin 14 (CAN Lo) - Light/Blue-Yellow) of the OBD-II port labelled “OBD2” into either of the device cavities.

    • Ensure the wires are seated in the grooves of the clamp as shown.

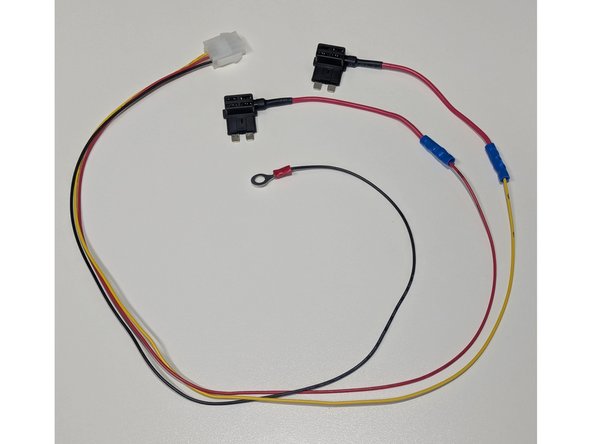
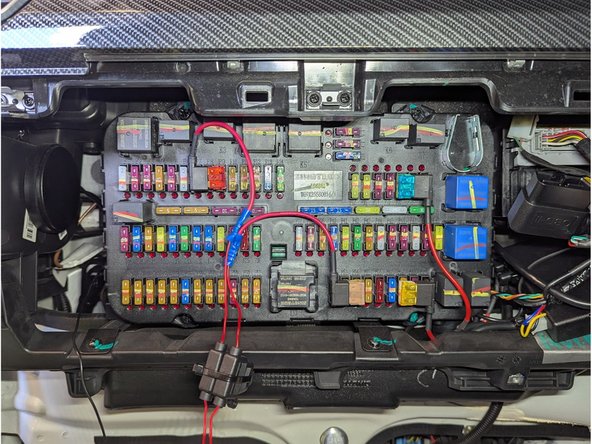
  3. Prepare the below setup using the HRN-CW03K3-A harness and standard size fuse tap connector. Prepare the below setup using the HRN-CW03K3-A harness and standard size fuse tap connector. Prepare the below setup using the HRN-CW03K3-A harness and standard size fuse tap connector.
    • Prepare the below setup using the HRN-CW03K3-A harness and standard size fuse tap connector.

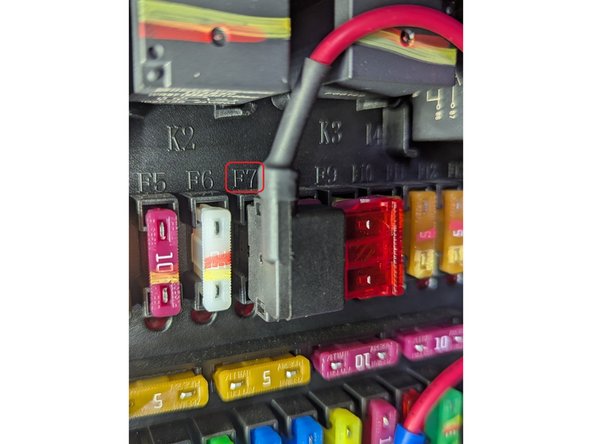
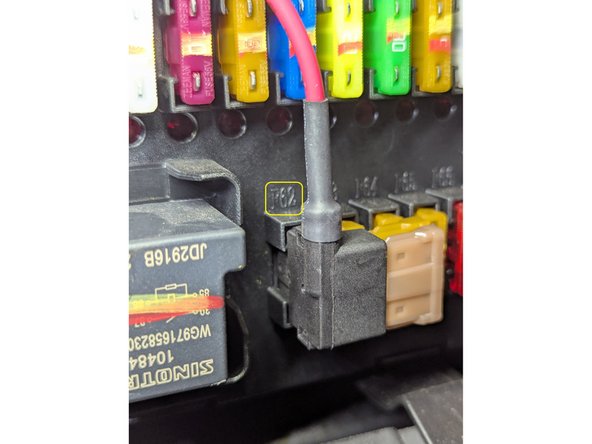
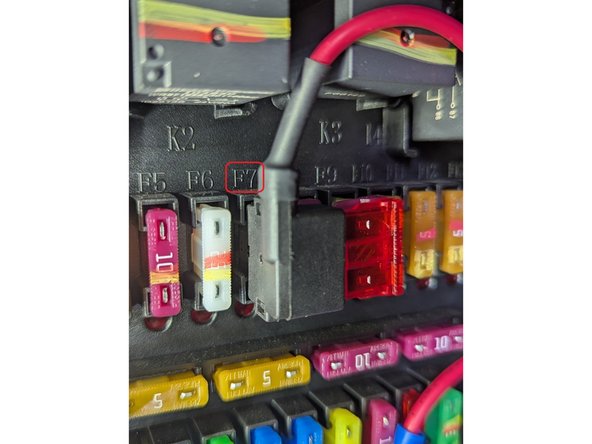
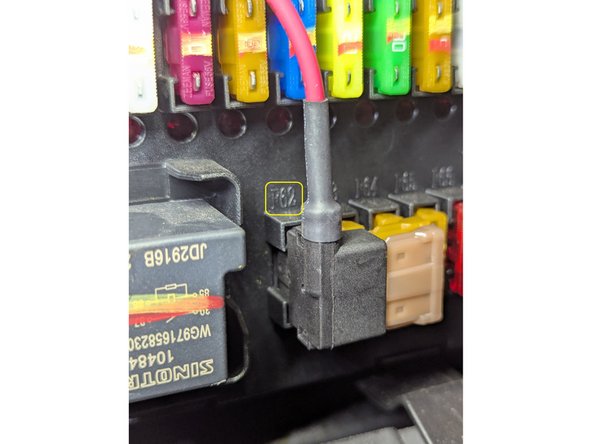
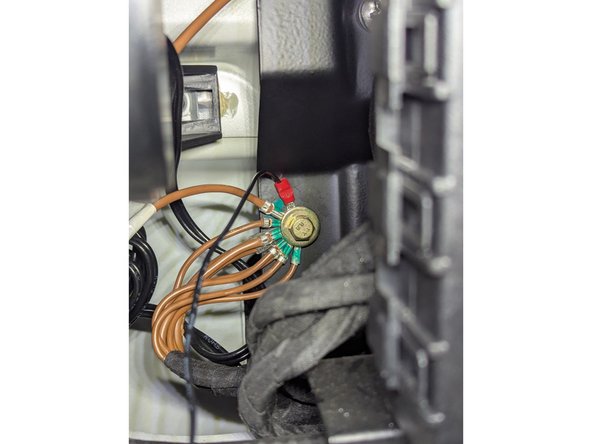
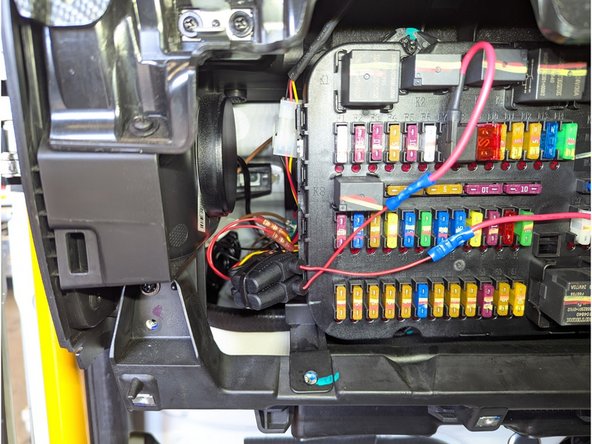
  4. For constant Power source, use Fuse F7 10A located in the top row as shown. For Ignition source, use Fuse F62 5A located in the bottom row as shown. Route the white connector of the the HRN-CW03K3-A harness behind the fuse block. Attach the ring terminal of the BLACK wire (GROUND) as shown.
    • For constant Power source, use Fuse F7 10A located in the top row as shown.

    • For Ignition source, use Fuse F62 5A located in the bottom row as shown.

    • Route the white connector of the the HRN-CW03K3-A harness behind the fuse block. Attach the ring terminal of the BLACK wire (GROUND) as shown.

  5. Completed connection view
    • Completed connection view

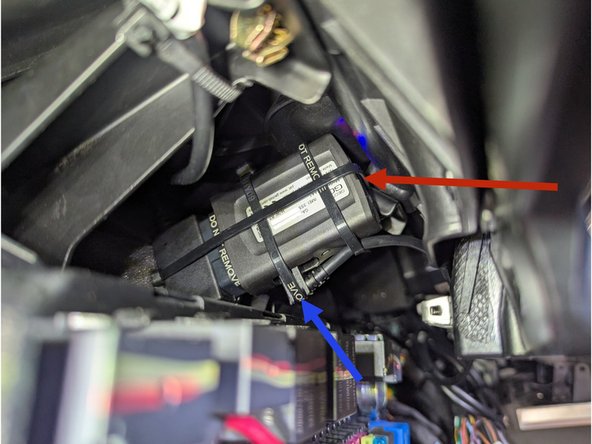
  6. Secure IOX-CLAMP to GO9 with a cable tie.
    • Secure IOX-CLAMP to GO9 with a cable tie.

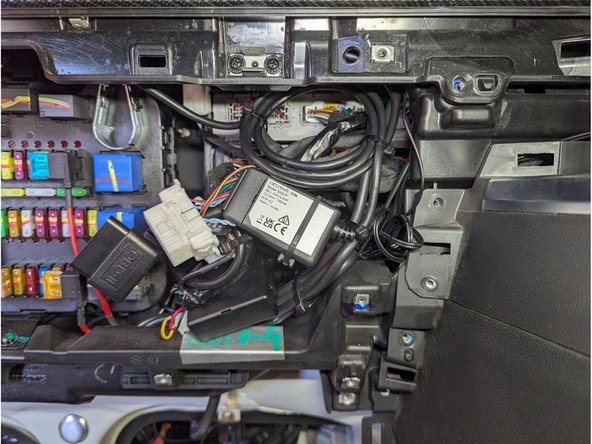
    • Plug GO9 into HRN-CW03K3-A and secure with a cable tie.

    • Secure the GO device to a suitable location (plastic bracket on top of the fuse block) using cable-ties as shown. Ensure that the serial number of the GO9 device is facing outwards, and is not covered by, or in contact with, any metal surface.

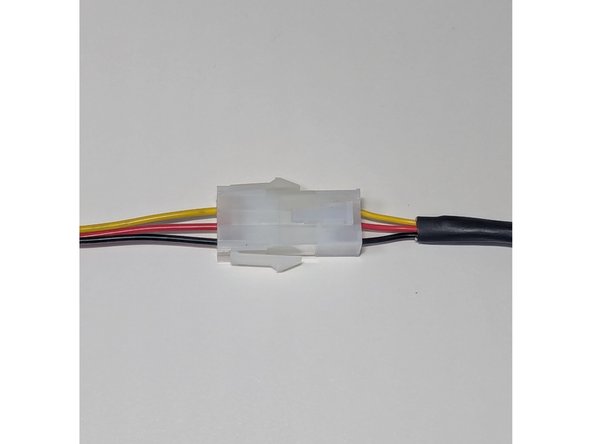
  7. Connect both ends of the white connector of the HRN-CW03K3-A harness as shown.
    • Connect both ends of the white connector of the HRN-CW03K3-A harness as shown.

  8. Secure loose cabling with a cable tie and replace all panels, connectors, screws, and clips in the reverse order they were removed. Secure loose cabling with a cable tie and replace all panels, connectors, screws, and clips in the reverse order they were removed.
    • Secure loose cabling with a cable tie and replace all panels, connectors, screws, and clips in the reverse order they were removed.

Finish Line

Jason Fox

Member since: 9/14/23

145 Guides authored

Team

Field Service Specialists Member of Field Service Specialists

8 Members

300 Guides authored