Video Overview
-
-
The Certified Power / Cirus Freedom 2 and 2.1 both require firmware and, the addition of the Certified Power / Cirus SG07051073 AVL harness.
-
The Certified Power / Cirus SG07051073 AVL harness must be installed by a Certified Power / Cirus technician.
-
Only the Certified Power / Cirus Freedom 2.2 is AVL ready (having both firmware and harness).
-
Confirm that the firmware on the main power-up screen is version 6 or greater.
-
Prior to installation, contact your Certified Power representative for instructions on how to enter the menu system as an administrator.
-
-
-
The IOX-WRKS primary port connects to the AVL DB9 serial port on the Certified Power AVL Harness using the standard null cable HRN-DB9NM.
-
-
-
Confirm that the data format is “String 1".
-
Select [System Setup].
-
Select [Telematics].
-
Set to "String 1" and save settings.
-
Reboot the controller.
-
The data will now be correctly formatted and the baud rate will be set to "9600".
-
-
-
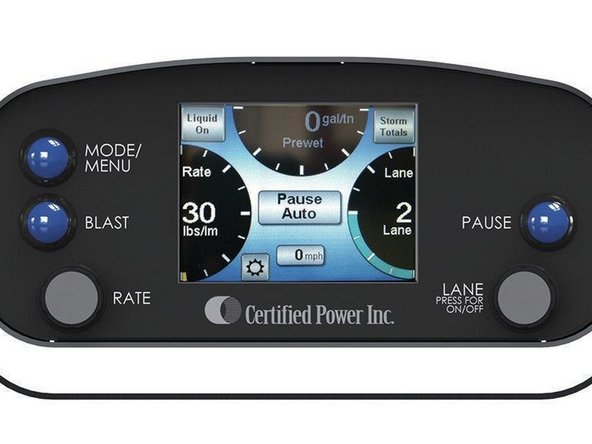
Using the buttons and the LCD screen, follow the instructions below to place the Certified Power / Cirus Freedom 2 into Simulation Mode for verification.
-
-
-
Place the controller in “Manual” mode. This will simulate ground speed and allow for data capture and verification. Return the controller to "Auto" mode after verification is complete.
-
If "Manual" mode is unavailable on the operator screen, follow the instructions below.
-
Press and hold the MODE button on the operator panel, or touch the side bar on the screen.
-
Select [Technician] and enter the password (default is blank). Press "Okay".
-
Set the [Test Speed] to "30MPH" and make sure you are in "Auto Pause".
-
Set the [Material Rate] on screen to "200lbs/mi". Press "Pause".
-
Perform data capture and verification.
-
Place the controller back into its original settings after verification is complete.
-


