Recommended Tools & Consumables
No Recommended Tools & Consumables specified.
-
-
Carrier Transicold X2100A controller requires HRN-RCCCAADV harness to connect to the refrigeration unit.
-
HRN-RW03K4 is required for the constant power, ignition & ground connections for the GO RUGGED device
-
-
-
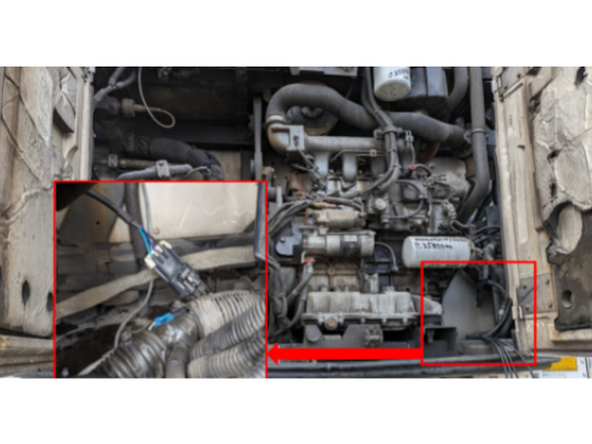
In this example installation, we connect directly to the battery of the refrigeration unit for our constant power and ground connections using HRN-RW03K4.
-
RED Battery Wire - Locate and verify a constant +12/24V Battery source.
-
BLACK Ground Wire - Locate and verify a ground source. The reference point directly comes from the battery terminal, and the refrigeration units chassis.
-
Always use a digital multimeter to locate and verify your connection points.
-
-
-
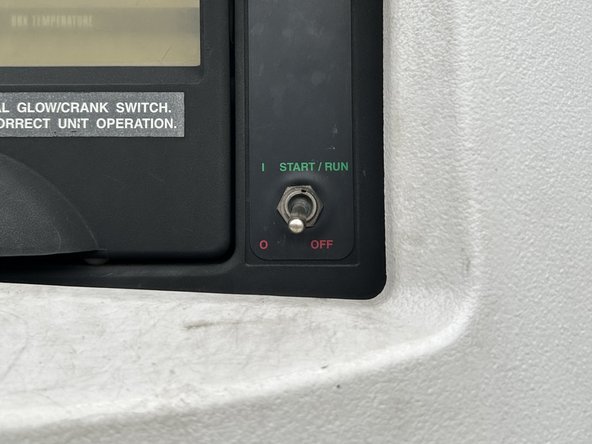
YELLOW Ignition Wire - The ignition wire must be connected to the refrigeration unit controller ignition source. Wire should be labeled HC11-1RS2
-
Verify that the ignition interface point has 12V/24V when the refrigeration unit's START / RUN switch is ON.
-
Verify that the ignition interface point has 0V when the refrigeration unit’s START / RUN switch is OFF.
-
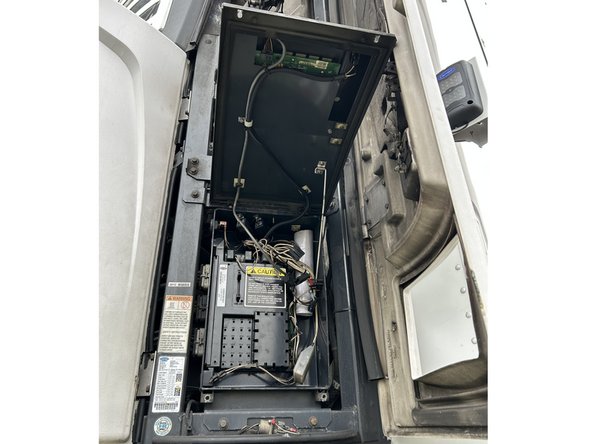
You may need to open the controller panel to access the wires for your ignition source.
-
-
-
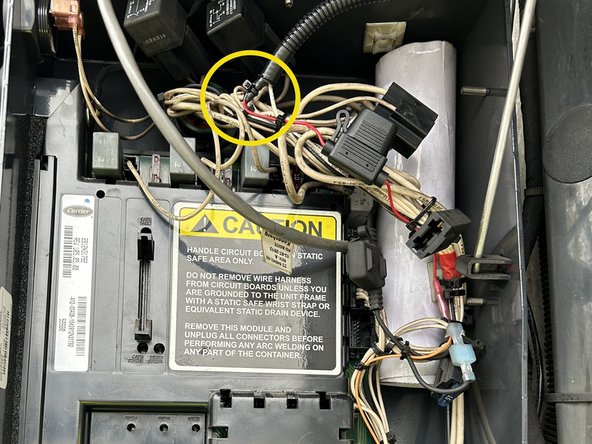
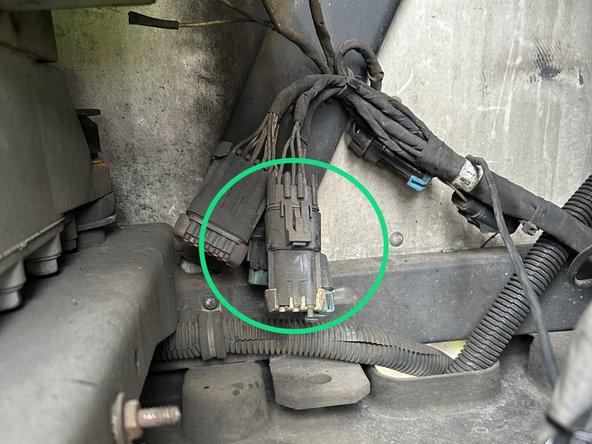
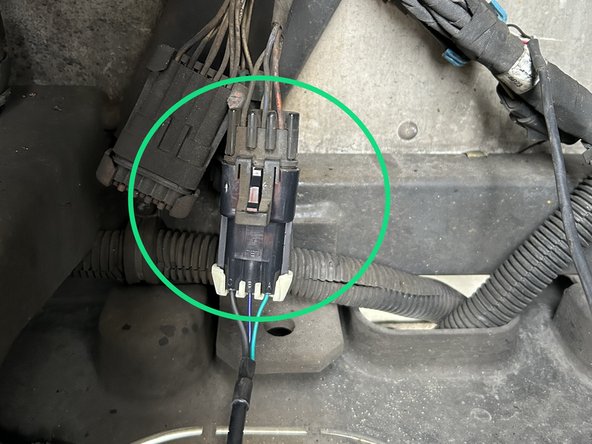
Connect the HRN-RCCCAADV harness to the Serial Port 3-pin connector located near the right compartment of the unit.
-
If the serial port is not free, contact the support team.
-
Ensure the connection is secure and locked into place.
-
Use dielectric grease whenever connections may be exposed to moisture.
-
-
-
For more information please refer to this document.
-