Introduction
Currently supported use cases:
- Driver Seatbelt - Tracks whether the driver's seatbelt is Buckled or Unbuckled
- Power Take-Off (PTO) - Tracks whether auxiliary equipment (e.g., a crane or pump) is Engaged or Disengaged
- Cargo Door - Tracks whether a cargo door is Open or Closed
- Generic Digital Input - Records the raw on/off signal without a specific label. This option can be used alongside other use cases.
Recommended Tools & Consumables
Hardware & Accessories
-
-
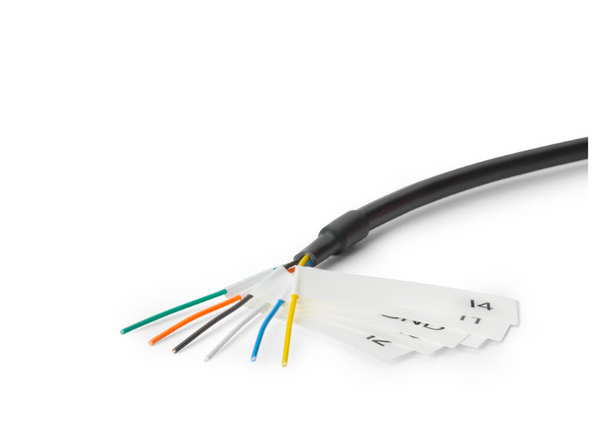
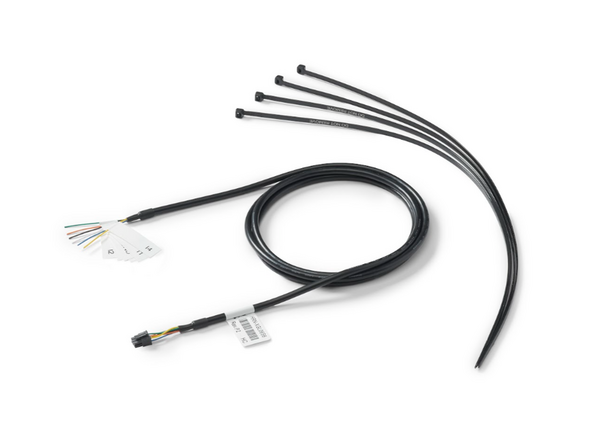
HRN-XGL06S6 has 4 Inputs labeled I1 - I4.
-
You will notice a White wire labeled O1 and Black labeled GND. These are not used at this time.
-
-
-
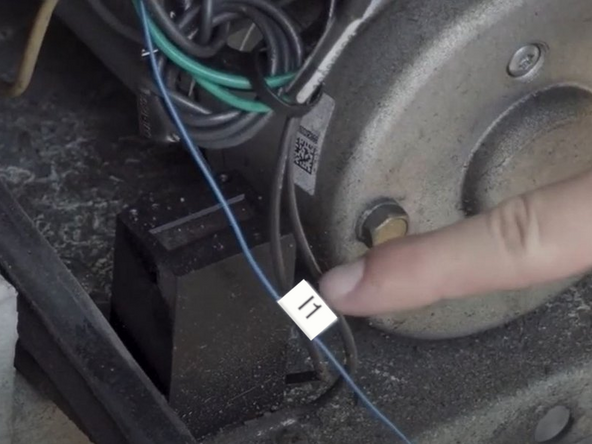
Using a Digital Multimeter identify wires in the vehicle to connect to for desired telemetry. Identify a wire that changes state: for example voltage changes when door opens, seatbelt buckles, etc.
-
It may be useful to refer to one of the following resources (i.e. ALLDATA™, WireSheet™, Mitchell1 ProDemand™ / eAutoRepair™ or equivalent) to locate the required wire in the vehicle.
-
Connect the desired inputs in the vehicle to the HRN-XGL06S6 wires as needed.
-
-
-
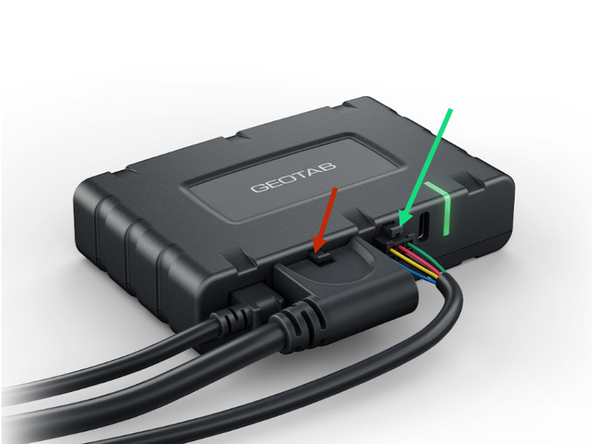
Connect the GPIO harness to the I/O port on the back of your GO Device using the 6 pin Molex connector.
-
Plug Harness into GO device.
-
Be sure both clip in place. Due to this clip securing the connection a cable tie is not required.
-
-
-
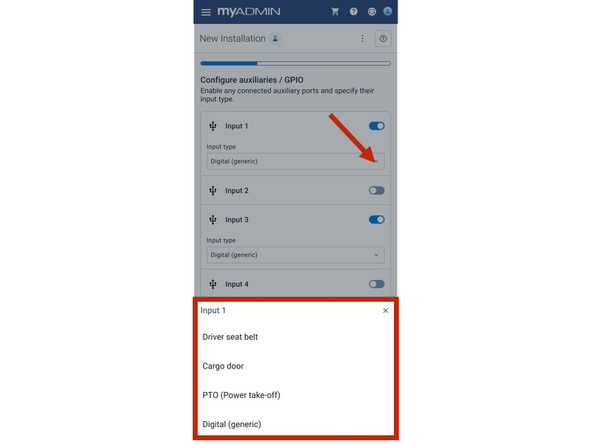
When setting up Data Labelling, you will assign one of the following use cases to each digital input on your device:
-
Cargo Door - Tracks whether a cargo door is Open or Closed
-
Power Take-Off (PTO) - Tracks whether auxiliary equipment (e.g., a crane or pump) is Engaged or Disengaged
-
Driver Seatbelt - Tracks whether the driver's seatbelt is Buckled or Unbuckled
-
Generic Digital Input - Records the raw on/off signal without a specific label. This option can be used alongside other use cases.
-
Each input can only be assigned one use case at a time, except for Generic Digital Input.
-
Ensure the harness is wired into the vehicle and plugged in prior to powering on the GO10 or GO10 Plus device
-
-
-
Access MyInstall.
-
Select “New installation”
-
Scan the barcode on your device or manually enter the serial number (starting with "X") to locate your GO10™ or GO10 Plus™.
-
-
-
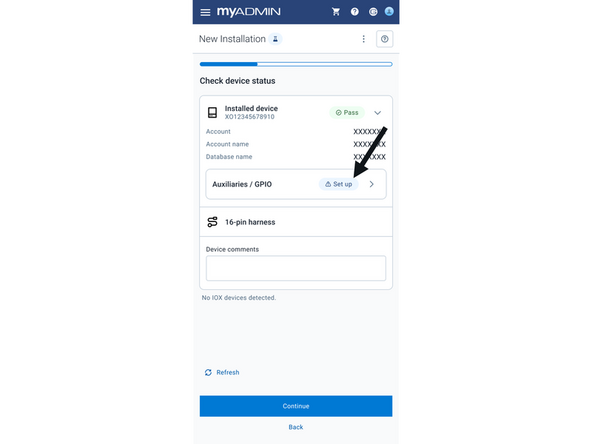
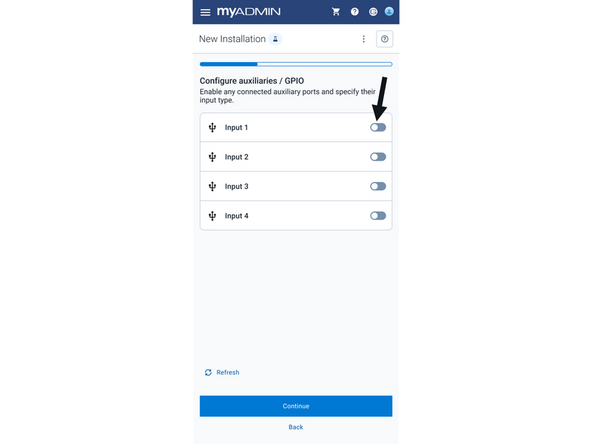
On the Connected Equipment screen, tap "GPIO Setup" on the device card to open the Data Labelling configuration page.
-
-
-
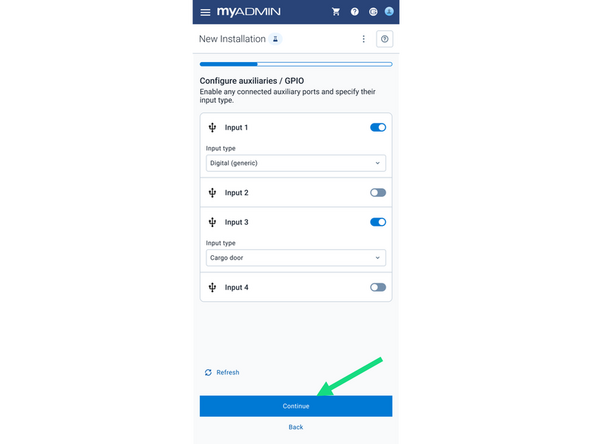
Enable each input used by toggling the switch on.
-
Choose the appropriate use case from the drop down list.
-
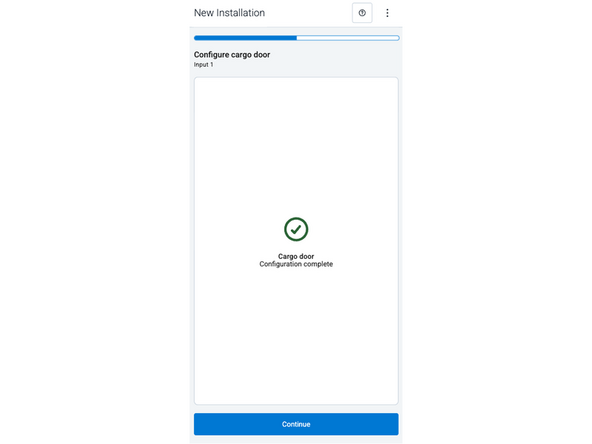
Tap continue to complete calibration.
-
Inputs can be left unassigned if not connected to anything in the vehicle.
-
-
-
IMPORTANT: All inputs must be "off" position before starting. For example seatbelt unbuckled, PTO Off, Cargo Door Closed.
-
-
-
The app will display a loading screen for about 10 seconds while the device prepares for calibration.
-
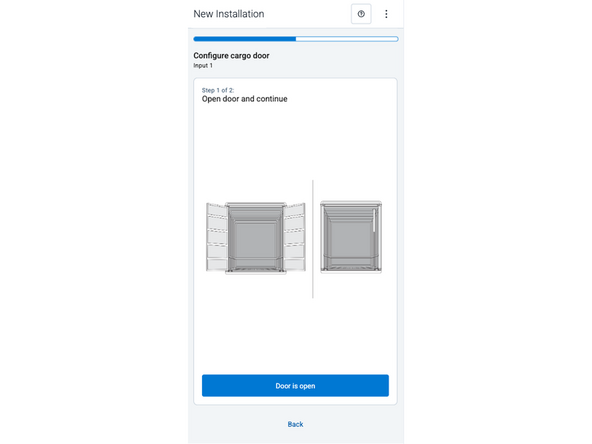
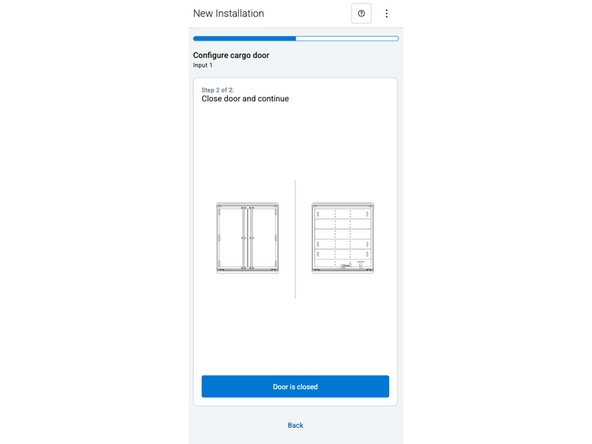
For inputs requiring calibration (Seatbelt, PTO, Cargo Door), the app guides you through each one individually:
-
Trigger the first state (buckle seatbelt / engage PTO / open door) → follow instructions on the screen.
-
Trigger the opposite state (unbuckle / deactivate / close) → wait for screen confirmation. Click to confirm.
-
NOTE: Each input must be calibrated within 2 minutes or the entire configuration is cancelled — restart from previous step. Back button preserves use case selections.
-
-
-
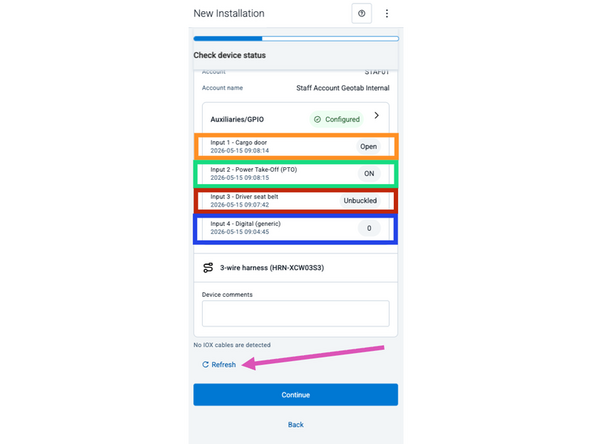
Once the calibration is complete, you will be returned to the Connected Equipment screen, the current status of each input is displayed:
-
Cargo Door: Open or Closed
-
PTO: Engaged or Disengaged
-
Driver Seatbelt: Buckled or Unbuckled
-
Generic Digital Input: 0 (off) or 1 (on)
-
Toggle each physical input to confirm the status updates. Use the refresh button if status does not update immediately.
-